
If you’re planning to purchase a wine fridge and are excited to start storing your favorite bottles at the perfect temperature, you’ve come to the right place.
In this comprehensive installation guide, I’ll take you through the step-by-step process of installing a wine fridge, ensuring that you achieve optimal results. Whether you’re a DIY enthusiast or just want to save some money by installing the unit yourself, this guide cover that for you!
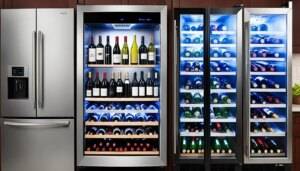
Installing a built-in (under counter) wine fridge involves careful preparation and precise placement. With the right tools and a little patience, you’ll be enjoying your perfectly chilled wines. Check further!
Key Takeaways:
- Proper preparation and careful placement are essential for installing a wine fridge.
- Measure the available space and consider the dimensions of the unit and nearness of a power source before purchasing.
- Tools needed for installation include a spirit level, tape measure, screwdriver, and the wine fridge’s manual.
- Built-in wine fridges come in various sizes; be sure to allow for proper ventilation.
- By following the step-by-step process and considering important factors, anyone can successfully install a wine fridge.
Preparation Before Purchasing
Before purchasing a wine fridge, it is crucial to thoroughly prepare and assess your installation requirements. Here is a checklist of essential considerations and best practices to ensure a successful wine fridge setup:
1. Measure The Space
- Start by measuring the space or cavity where you plan to install the wine fridge.
- Double-check the dimensions of the appliance and ensure that there is enough room for the height, width, and depth of the unit. Include an inch on all sides for proper ventilation.
- Remember to consider the space required for the door to swing open.
2. Check Product Specifications
- Refer to the product specifications of the wine fridge you are interested in purchasing.
- These specifications will provide important details such as depth and required space around the fridge.
- Take note of these measurements to ensure a proper fit.
3. Consider Ventilation
- Proper ventilation is crucial for the efficient operation of a wine fridge.
- Check the product specifications for guidelines on the amount of space required around the sides and rear of the unit to allow for adequate airflow.
- Ensure that the space you have available meets these ventilation requirements for optimal performance.
4. Electrical Requirements
Before installing a wine fridge, consider the electrical requirements to ensure safe and proper operation. Here are key points to keep in mind:
- Voltage: Most wine refrigerators require a standard 120-volt electrical outlet. It is essential to check the voltage specifications of the specific model you have purchased to ensure compatibility.
- Grounded Outlet: Connect the wine fridge to a grounded outlet to prevent electrical hazards and ensure the safety of the appliance.
- Power Consumption: Consider the power consumption of the wine fridge, especially if you plan to install multiple appliances on the same circuit. Ensure that the electrical circuit can handle the combined load without tripping the breaker.
By thoroughly preparing before purchasing a wine fridge, you can ensure that you select the right size and model that fits your space and installation needs. This checklist will help guide you through the process and ensure a smooth and successful installation.
The Tools For Installing The Wine Cooler
What Tools Do You Need For Installation?
To install a built-in wine cooler, you will need a few basic tools. These include:
- A spirit level to ensure the unit is level
- Scrap wood or shims to level the unit if needed
- A tape measure for accurate measurements
- A screwdriver for any necessary adjustments or installation of the handle
- The manual for the wine cooler to reference specific instructions
Having these tools on hand will make the installation process easier and more efficient.
Why These Tools Are Necessary?
- The spirit level is essential to ensure that the wine fridge is installed level, which is crucial for proper functioning.
- Scrap wood or shims can be used to level the unit if the floor is uneven.
- The tape measure allows you to accurately measure the space and ensure that the wine fridge will fit properly.
- The screwdriver is needed for adjusting the unit or installing the handle.
- The manual provides specific instructions for your particular wine cooler model.

Steps For Wine Fridge Installation
1. Placement Of The Wine Cooler
- Carefully position the wine refrigerator, ensuring it is level and has ample space around it for proper ventilation.
- Most wine coolers come equipped with adjustable feet for easy placement on any type of surface.
2. Connection Of The Wine Cooler
- Connect the wine fridge to a grounded outlet that meets its electrical requirements.
- Typically, wine refrigerators need a standard 120-volt electrical outlet.
3. Allowing The Wine Cooler To Settle
- It is advisable to allow the wine refrigerator to settle for at least 24 hours before storing any wine inside.
- This allows the cooler to reach optimal temperature and humidity levels.
4. Loading The Wine Cooler
- Once the wine fridge has settled, you can load your wine bottles into it.
- Be sure to arrange them carefully to avoid disturbing any sediment.
5. Monitoring The Wine Cooler
- Regularly check the temperature and humidity levels in the wine refrigerator to ensure they remain consistent.
- While most wine coolers have a built-in thermometer, using an external thermometer can offer an extra level of assurance.
Tips & Tricks
Here are some additional tips for a wine fridge installing process:
- Optimal Temperature: Ensure that the location where you install the wine fridge maintains a consistent temperature to help the unit operate efficiently.
- Avoid Direct Sunlight: Position the wine fridge away from direct sunlight or heat sources to prevent temperature fluctuations inside the unit.
- Regular Maintenance: Schedule regular maintenance checks to clean the wine fridge, check for any issues, and ensure it continues to function correctly.
- Organize Bottles: Organize your wine bottles in the fridge based on type or age to make it easier to locate specific bottles when needed.
- Consider Shelving Options: If your wine fridge allows for adjustable shelving, experiment with different configurations to maximize storage space and accommodate various bottle sizes.
- Use Wine Tags: Utilize wine tags or labels to mark bottles with relevant information such as vintage, varietal, or region for quick identification.
- Invest in a Thermometer: Consider using an external thermometer inside the wine fridge to monitor temperature accurately and ensure optimal storage conditions for your wines.
Bottom Line
Overall, installing a wine fridge can be a worthwhile investment for any wine enthusiast. Not only does it provide convenience by keeping your wines at the perfect temperature, it also adds an elegant touch to your home.
Measure the space before buying a wine fridge to make sure it fits. Get the right size and ventilation. Use proper tools like a level, tape measure, screwdriver, and manual for installation. Follow the instructions carefully to mount and level the fridge properly for best results and enjoy chilled wines at home.
With the right tools and careful consideration of factors like space and ventilation, you can successfully install a wine fridge on your own.
Happy cooling!
FoodiesFridge
Source Links
- https://www.newair.com/blogs/learn/installing-wine-cooler-in-existing-cabinet
- https://expertwinestorage.co.uk/blogs/wine-storage/how-to-install-a-built-in-wine-cooler
- https://calefort.com/blogs/news/a-full-guide-to-wine-fridge-installation
- https://winecellarhq.com/blogs/news/10-tips-for-installing-and-positioning-your-new-wine-cooler